Tuesday, March 26, 2013

Tutorial: Simple Cute Inspiration Boards!!!


Inspiration Wall Boards!

We all have things, people, or pictures that inspire us.  I feel that if you look at whatever inspires you and focus on it, you can achieve your goals or inspirations.  So...this weekend I decided to make these cute inspiration boards to hang in my closet.    Follow the steps below to create your own inspiration boards. 

This is what you will need:
-Ribbon
-Cork Tiles  (Purchased at Walmart)- came in a set of four
-Wood Glue
-Picture Hanging Strips
-Self Adhesive Pearls, diamonds, anything cute or girly
-Scissors
-Push Pins


Step 1:
Take two of your cork tile boards and you are going to add some wood glue to one tile.  Then layer the second tile on top and press on it and hold it down for about 2-3 minutes.  I layered two boards because I don't want to damage my wall with the push pins(makes it thick enough).  Clean the excess glue off.


Step 2: 
Pick some ribbon of your choice and cute into strips, this will depend on how wide your cork tiles are.  Make sure you leave about two inches extra on each side.


Step 3:
These particular cork tiles that I purchased came with some adhesive squares. Glue one square to each corner of the ribbon.  Place your ribbon where you would like and glue the adhesive square to the back of the tile board.  Place as many ribbons as you like.

Step 4:
Decorate!  I purchased some scrapbooking items from an art supply store to use as my decorations.  The letters are made of cardboard and did not have any adhesive to the back so I used the same adhesive squares I used for the step above.  The pearls and diamonds where self-adhesive so there was no need for any type of glue.


Cute the adhesive squares to size

You can spell what ever you want your board to say.


Step 5: 
Take your picture hanging strips and place on the back of the boards.  I recommend placing one set on each of the four corners for more security.
These will not damage your wall
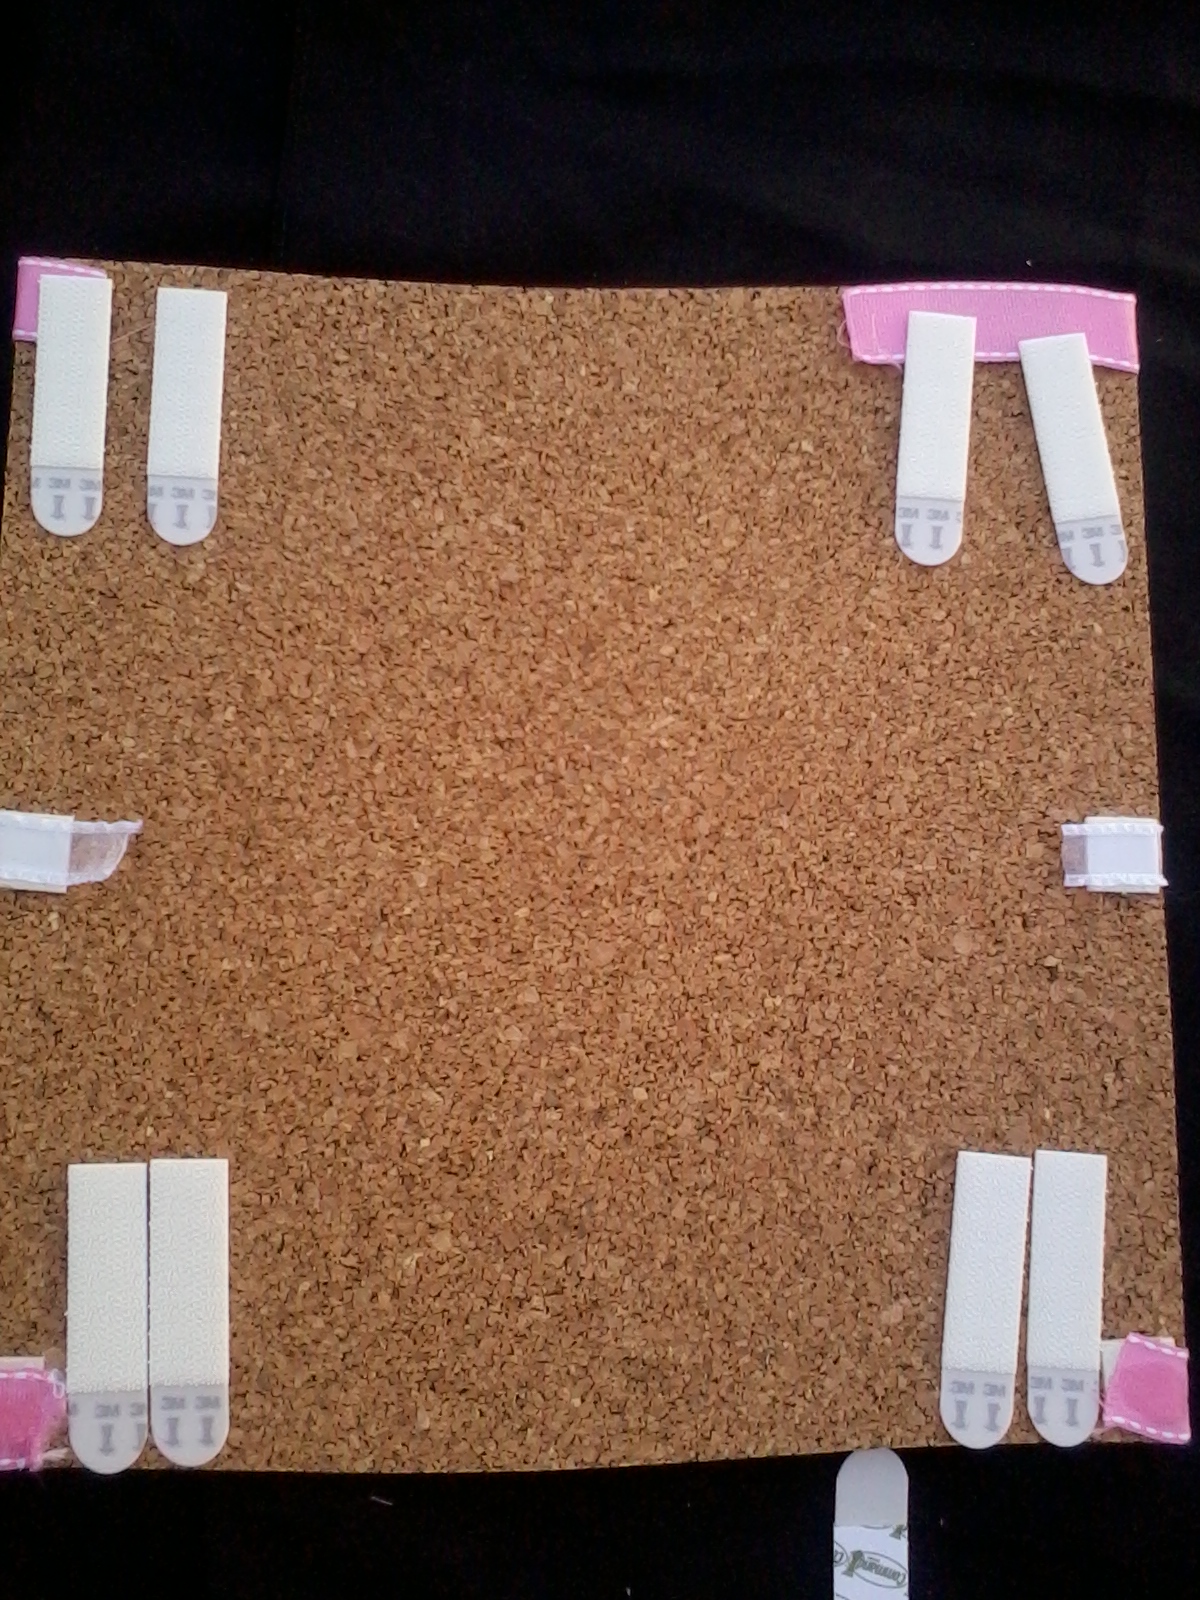


Clasp two together.


Take on set and place on all four corners.  DO NOT take of the other protective strip just yet.


Step 6:
Hang on your wall!

Remove the back part of each strip.


This is how it should look if you take it off the wall.
These will remain on the wall


My final creations!

Love to cut out items out of magazines that I like or inspire me.


Have fun!  Don't forget to tag me @Missfely on Instagram so I can see your creations!


Xoxo,
Miss Fely <3
Stay connected:
 Instagram.com/MissFely

Facebook.com/FelysCollections

Twitter.com/FelysCollection


Pinterest.com/MissFely

DON'T FORGET TO INSERT YOUR EMAIL TO GET THE LATEST UPDATES...


www.FelysCollections.com


Sunday, March 24, 2013

L'OREAL EverPure Sulfate-Free Color Care System Review


 L'OREAL Paris EverPure Sulfate-Free Color Care System


Now a days who doesn't color their hair?  Most everyone I know has dyed their hair at least once in their lives.  I tend to color my hair maybe every 6 months or so.  I still don't have grey hair but I do it just to change my look just a tiny bit.  I never go all crazy with my hair, I like to keep it simple.  I generally just do all one shade for my whole head so I go with a chocolate brown or a soft black most of the time.

Over the years I have noticed my hair becoming thinner, frizzy and more brittle.  It also doesn't have the shine I would like it to have.  I have very long hair that goes down almost to my waist(no extensions) so it is very hard to manage it and take care of it.

Miss Fely


It has been about six weeks since I last colored my hair and have been using L'oreal Paris Hair Expertise EverPure Sulfate-Free Color Care System Moister Shampoo and Smooth Conditioner since day one.  It is made for color treated hair, and considered an anti-fade system.


This is what the Shampoo claims:  "EverPure Moisture Shampoo gently cleanses and revitalizes dry hair with essential moisture.  Rich lather and natural aromatic properties from rosemary and juniper invigorate the senses.  Hair is left naturally soft and nourished, helping your color shine through."


I have to agree with them that it is a very gentle cleanser.  I don't really see the rich lather though(hence the sulfate free) but I don't use more than what I generally use with any other shampoo because just because it doesn't lather does not mean it doesn't clean.  Sulfate is what generally makes it have that rich lather(and burns your eyes...ouuuch).  Once or twice a week I wash with a different shampoo like Head & Shoulders just to really clean my scalp.

This is what the Conditioner claims:  "EverPure Smooth Conditioner smoothes and conditions frizzy hair, while protecting from humidity and improving texture.  Natural aromatic properties from rosemary and mint invigorate the senses.  The creamy, protective formula leaves hair silky smooth and virtually frizz-free, helping your color shine through."


I have noticed that my hair is less frizzy when I don't style as usual.  Generally I leave it in for about 2-3 minutes before rinsing to allow it to penetrate my hair and then I rinse.

Just the other day someone asked me what I had done to my hair  because it looked good.  It really took me by surprise because all I did was get out of the shower and comb through.  Also,  I have noticed that my hair color is still the same shade that I colored it 6 weeks ago.  Most of the time my tips tend to start going lighter for some reason.


I have to say that I am really liking the results from these two products combined.  Not sure if I would get the same results if I only used one alone.

Also, I've always wanted to donate my hair to a cancer organization but don't know what the requirements are.  If you know please let me know in the comment section below.  How healthy does it need to be?  Inches long?  Can it be color treated?  Organizations you would recommend? 


Xoxo,
Miss Fely <3
Stay connected:
 Instagram.com/MissFely

Facebook.com/FelysCollections

Twitter.com/FelysCollection


Pinterest.com/MissFely

DON'T FORGET TO INSERT YOUR EMAIL TO GET THE LATEST UPDATES...


www.FelysCollections.com

Saturday, March 23, 2013

Tutorial: Easter Nails

Credit: mygnails.blogspot.com


I know you have probably seen something similar to this nail art but here are the steps on creating your own little chick in an egg for Easter.
Easter Nails...
Nail art is so fun for me, I get to use my imagination and create my own master piece.  It take a lot of patience like I have mentioned before but it is something everyone can do as long as you have steps to follow.

With Easter right around the corner, below is a cute design for this holiday...just follow the steps and just remember to have fun with it.  If it doesn't work out exactly as shown, make it your own design, let your imagination flow.

What I used to create this look:
  • 1-2 Toothpicks
  • Clear Bottom Coat: Wet n Wild 401A
  • Orly Gumdrop
  • L.A. Colors Art Decor-White
  • N.Y.C.Taxi Yellow Creme-114A
  • Nicole by O.P.I.-Razzle Dazzler-127
  • MAC-Frost Fireball-A17
  • Top Coat-Out The Door by INM
Remember, you can always substitute with your own brands and/or colors.
These are all the nail polishes that I used for this look.
You want to use a base coat to your nails before adding color. This will prevent your nails from becoming yellow.

After the base coat, I used this nail polish from Orly called Gumdrop.  Add to all fingernails.

Then you want to choose the finger where you want your main design to go. Place a yellow dot right about the middle of your fingernail maybe just a bit higher. For this I used N.Y.C. in Taxi Yellow Creme #114A.
You then want to add a half oval to the bottom of the yellow dot and a small half circle to the top. The bottom of the egg shell should be a little longer. For this I used L.A. Colors Art Decor in white.


Then grab your Toothpick.  This will be used for the next two steps...
Then I used Razzle Dazzler #127 from Nicole by O.P.I., to create two dots for the eyes right below the top shell of the egg.  Dip your toothpick just a enough to have a small dab at the tip.  Carefully make two dots right next to each other.

Then I used Mac-Frost Fireball-A17. Once again, grab the other side of your toothpick and dot a small dot below the eyes.
Use another toothpick and to create dots.
Let your imagination flow and create some squiggly lines, dots, whatever comes to mind. You don't have to use only white for your other designs. You can add some yellow or orange dots, or lines. This is my final product!
My other hand.
To give it that salon look, I used a top coat I found at Sally's Beauty Supply and will never, ever stop using it.  It is called, Out The Door by INM. Best top coat I have found!


Xoxo,
Miss Fely <3
Stay connected:
 Instagram.com/MissFely

Facebook.com/FelysCollections

Twitter.com/FelysCollection


Pinterest.com/MissFely

DON'T FORGET TO INSERT YOUR EMAIL TO GET THE LATEST UPDATES...


www.FelysCollections.com